Walmart sponsored this post, and all opinions within it are my own.
Inspiration comes at the most random moments doesn’t it? The other morning, I was sitting with my kids, staring at the Christmas tree, thinking of how beautiful a simple tree looks when it hit me. I envisioned a simple and icy wreath for our front door and knew I had to make it! Once I logged onto Walmart.com, I realized I could order everything I needed for my modern holiday wreath DIY and have it delivered as soon as same day, thanks to my Walmart+ membership! I even added in some apple cider to add to the holiday mood!

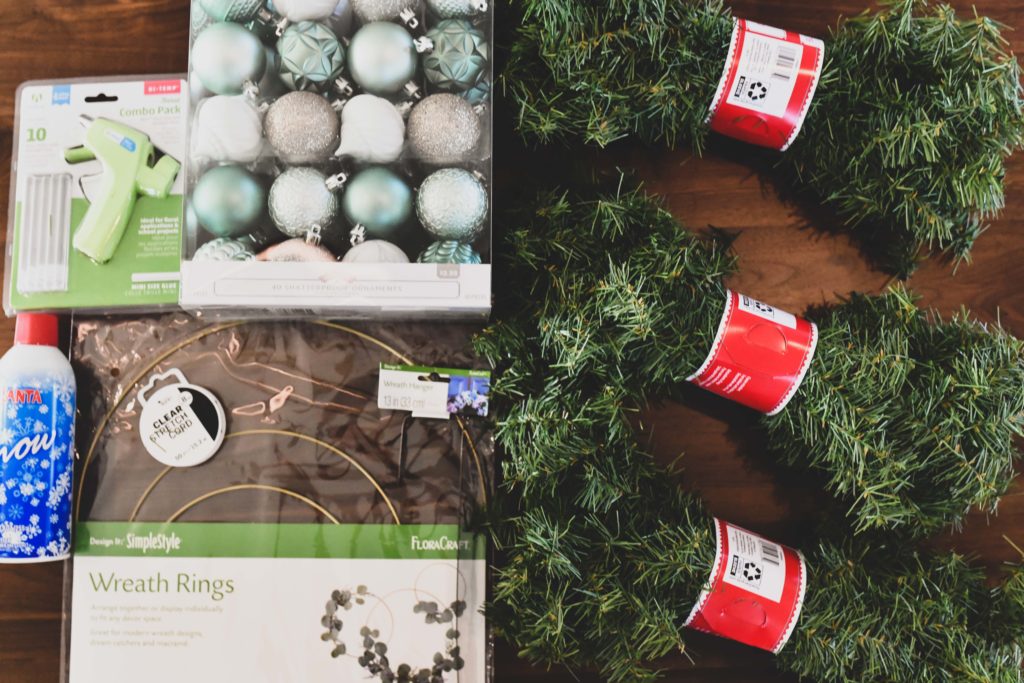
Holiday Wreath Materials:
- Fresh Gala Blend Apple Cider, 1/2 gallon
- AdTech Floral Mini High Temp Hot Glue Gun with Glue Sticks, Combo Pack (05660)
- Cousin 0.8 mmx50’ Stretch Beading Clear Cord
- Santa Snow
- Holiday Time 40 Count Shatterproof Ornaments- Green, Silver & White
- FloraCraft Metal Wreath Hanger 13 inch Rubbed Bronze
- FloraCraft 3-piece Wire Wreath Ring 7.8 inch, 9.8 inch and 13.8 inch Gold
- Holiday Time Non-Lit Branch Christmas Garland, 9’
 I put in my order for all of these items in the morning and had them delivered, for free, by evening! With free unlimited delivery through Walmart+, you have a $35 minimum, and some restrictions may apply. You can see what benefits you will receive when you type in your zip code.
Holiday Wreath DIY Instructions:
- Lay the metal wreath rings in the design shape that you want to create! You don’t have to keep it in this shape but at least now you know what the final product will look like.
- Take the largest ring and add greenery to fill 1/4 of the edge. And then do the same with the other two rings.

- Enjoy a sip of apple cider because this is a fun holiday project! 🙂
- Cut several pieces of the transparent cord at foot lengths so that they are ready for the ornaments.
- Select the ornaments that you want to use for your design! I decided to go with all of the matte pieces!

- Attach the three wreath rings. You can do this with greenery, hot glue, or with the clear cord. I did a mixture of all three to be safe!
- Hang the wreath on the wreath hanger because that will be the easiest way for you to tie the ornaments onto the rings accurately.
- Spray the Santa snow onto the greenery if you want to add that icy effect! Don’t worry. Santa Snow wipes off easily if you get it onto anything.

- Tie the transparent cord to each ornament and then tie the ornaments to the rings. This part is the most time-consuming because you may need to play around with it until you figure out the design you like!
- You can hang the wreath immediately on the wreath hanger, or you can tie a long piece of cord from the wreath to the wreath hanger! Cut off any residual cord, and voilà, finished with your wreath DIY!

One of my favorite things about a modern wreath DIY like this is that you can’t go wrong. If you have a little more greenery on one wreath, it’s okay! The beauty in a modern holiday wreath is that it’s minimal with pops of color. Walmart has so many ornaments to choose from, so you don’t have to pick this color scheme. Check out what Walmart offers online today!

Why do I love my Walmart+ membership?
As a busy mom of two, this membership makes my life easier! Seriously! From groceries to craft supplies, I get it all at the everyday low prices I love. Sometimes even on the same day if the time slot is available. My benefits include free unlimited delivery ($35 minimum, restrictions apply), member prices on fuel, and with mobile scan & go I can check out with my phone as I shop in-store (saves time & it’s contact-free). If you’re thinking about getting a Walmart+ membership, try it out today with the free 15-day trial! The cost of a Walmart+ membership is $12.95/month or $98/year.
If you make this holiday wreath DIY, tag me in it on Instagram at @thehonestShruth! I love seeing what y’all make!

Cheers,


![[No. 93] Love Is Real Mom Friends. Real Mom Friends](https://thehonestshruth.com/wp-content/uploads/2020/07/DSC06586-scaled-e1594924314133-218x150.jpg)


