DIY Black to Blonde Ombre Hair
By Shruthi Parker · March 2, 2017 · 8 min read
Objective: Create a mocha-brown-to-smoky-blonde ombre starting from black hair.
Time: Two weeks of actual work, two weeks of prep work
I guess for starters, I should tell you why I wanted to do this. There’s so much movement and glimmer in blonde and multi-tonal hair. I knew that with my jet-black hair, I could achieve glimmer with caramel & brown highlights, but I think the fact that anything near blonde was so unattainable made it even more attractive to me.
Or at least I thought it was unattainable. The other day, one of my girlfriends here in London asked me why I don’t just dye my hair and see how I like it. I told her it’s because so many people said it can’t be done, and when I looked on YouTube/Google for TAN Indian women who went lighter without brassy hair, it yielded zero search results. But then later that got me thinking—just because it may not be all over the web doesn’t mean I couldn’t try, right? At the end of the day, I figured it was just hair, so why not? If worse came to worst, I could just rock a bob.
Fully motivated, I went online to find quotes for drastic hair changes. WOAH. People were charging 250+ to take dark hair to light hair and add an ombre/balayage effect. I have been cutting my own hair for years, so spending even $50 at the salon seems pretty steep to me, let alone 250+ for a cut and color.
Every thread I read about DIY ended with a stylist saying, “Make sure you go to a stylist, otherwise horrible things will happen to you.” Okay, maybe not to that extent, but pretty much. People were scaring the c r a p out of me online about what happens if you forgo salon care. But I’m sitting here like, I just don’t have the money/time/care to go to a salon where somebody who knows me for ten minutes thinks they know my hair and can work with it well.
I’m also fairly over the people who say, “You should keep your dark hair” or “That’s what God gave you” or “Maybe try adding red?” I’ve already tried red; sure, God gave me black hair, but he also gave me lots of hair and that didn’t stop me from getting laser hair removal; aaand you should not tell me what to do.
So, I got started.
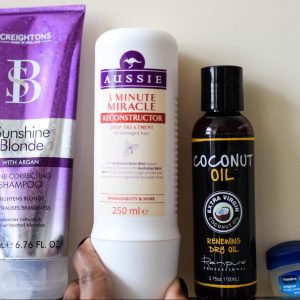
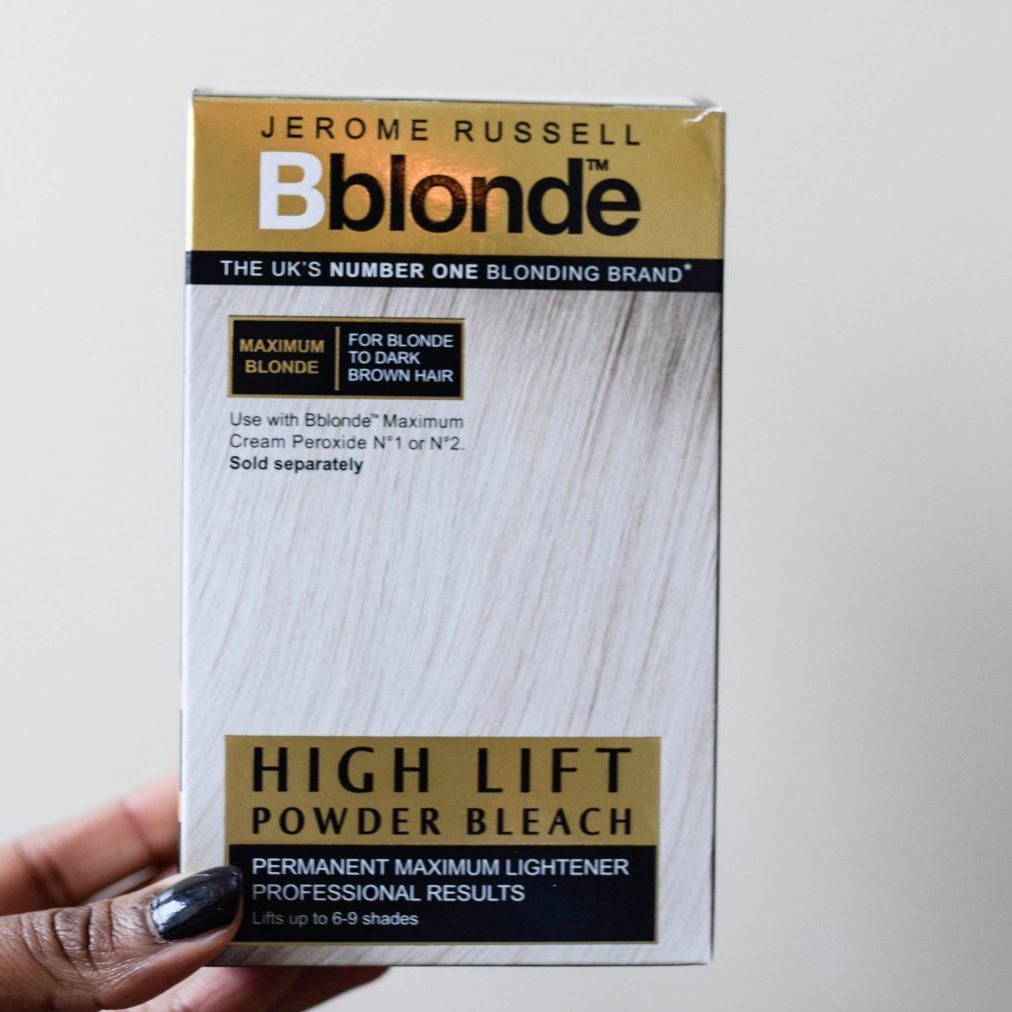
I conditioned my hair for two weeks beforehand with coconut oil hair masks and minimal shampoo. I’ve used coconut oil hair masks since I was like three (thanks, Mom), so my hair has been healthy even through the minor color adventures I experienced in high school and college. I went to the local pharmacy with my good friend Chaz, who has been dying her hair blonde since she was 14, and she helped me pick out the bleach and other tools I needed.
M A T E R I A L S :
- 4 packets of bleach powder
- 4 bottles of developer (that corresponds with the bleach)
- Comb to separate sections
- Black brush to apply bleach
- Hair pins to hold up my hair in sections
- Roll of cling wrap
- Container of Vaseline
- Towel for the floor
- Disposable t-shirt

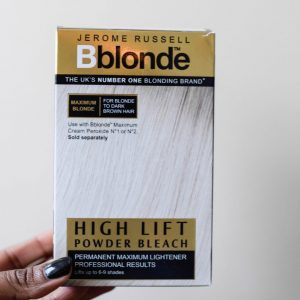
B L E A C H I N G P R O C E S S :
- I put on the disposable t-shirt, placed the towel on the floor, and applied Vaseline to my hairline. This way, bleach wouldn’t hurt my skin if it accidentally touched my face.
- Chaz was a dear and sectioned my hair off by location (top, middle, bottom) and applied the bleach thoroughly in my hair, starting with the bottoms and working upwards. She did my roots last.
- We wrapped my head in cling wrap and let it sit for 90 minutes (the maximum time bleach should be applied). After washing it out, I was a brilliant orange color. Hubby laughed way too hard, and so did I. But I guess this is where most women stop, because unfortunately, I’ve seen this color A LOT.
- Next, I used a purple shampoo, washed it out, and then applied a deep conditioning treatment to my hair to feed it because it was dry.
- I let it air dry, then covered the ends in coconut oil, wrapped my head in cling wrap, and went to sleep.
- The next day, I bleached my hair again with the same process as the day before (steps 1-3).
- Once I washed out the bleach this time, I applied two boxes of a light ash brown/dark ash blonde hair color.
- After the color was washed out with lukewarm-cool water, and my hair was damp but not dry, I applied a purple toner for 45 minutes, washed it out, and then deep conditioned my hair again.
- I trimmed my hair after the deep conditioning and left it like that for twelve days. During those twelve days, I rarely washed my hair; when I did, my hair and roots were soaked in coconut oil for at least one hour before I used a dime of purple shampoo to wash it out. My hair was thirsty, y’all, and it was eating up that coconut oil. I will say by the twelfth day, my hair felt soft and normal again, so I felt confident in taking the next step.

O M B R E P R O C E S S :
- 2 boxes of mocha brown color
- Toothbrush
- Black brush to apply the blonde color
- 2 boxes of multi-tonal blonde color
- Container of Vaseline
- Deep conditioner
- Disposable t-shirt
- Towel on the floor
- Put on the disposable t-shirt, placed the towel on the floor, and applied Vaseline to my hairline.
- I dyed most of my hair using the two boxes of multi-tonal blonde color. I didn’t get close to my roots, like 4-5 inches away, because I was going to dye that mocha anyways. Direction-wise, I started from the bottom and painted upward so that the bottom would appear most blonde.
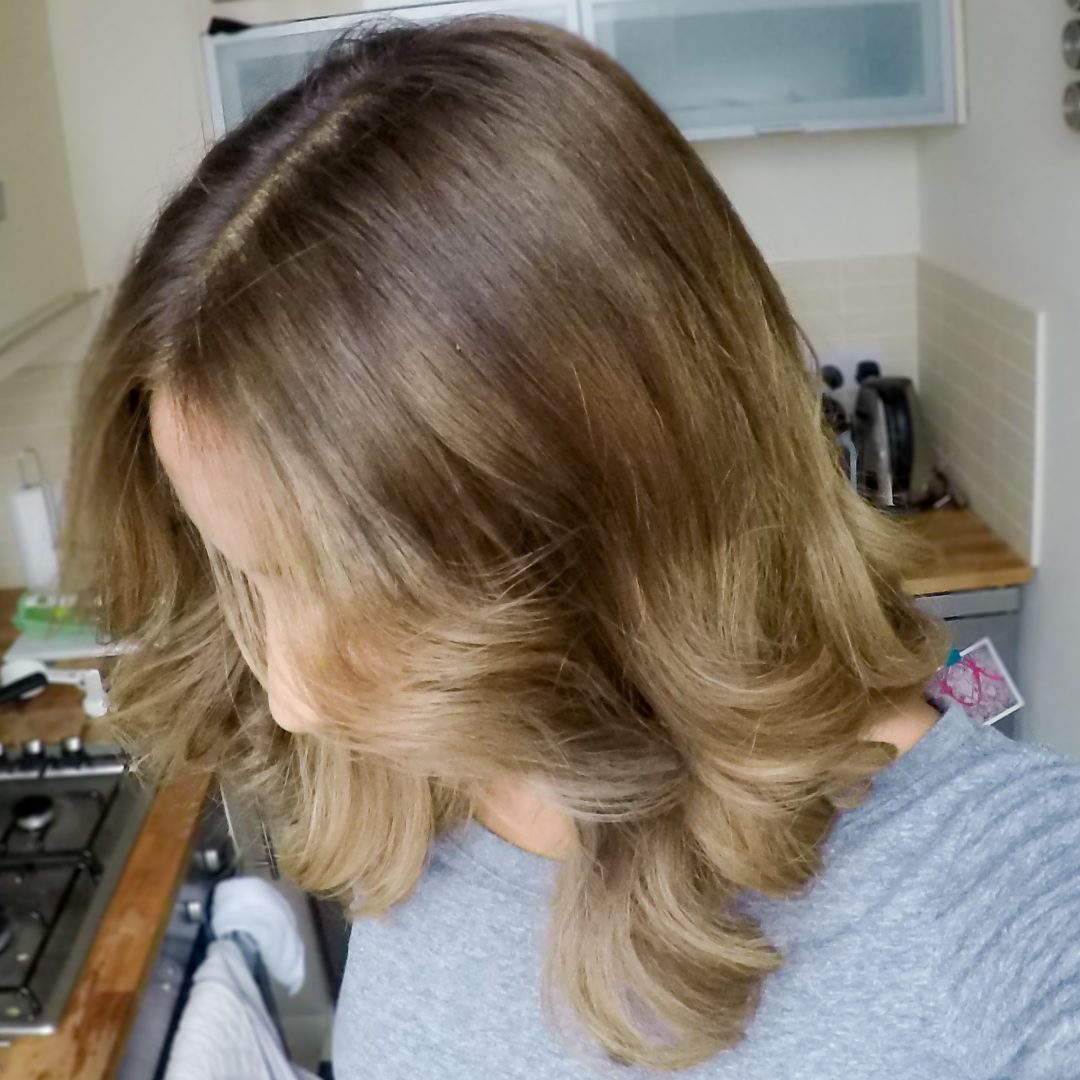
- After finishing the blonde boxes, I used the mocha brown and a toothbrush to paint from my roots downward. The top was pure mocha, the middle was a mixture of mocha and blonde, and the bottom was pure blonde. Toothbrushes are great because they cover lots of hair while brushing, and you won’t end up with a straight (gross) line across where the color stops—aka, an actual ombre.
- After all of that was completed, I sat for 20-25 minutes and then rinsed it out with lukewarm-cool water.
- Once all the color stopped running, I used the deep conditioner and let that sit for five minutes. Then I rinsed out the conditioner with lukewarm-cool water.
- Now, you can either get a trim again for totally healthy ends (I did), or you can get to styling!
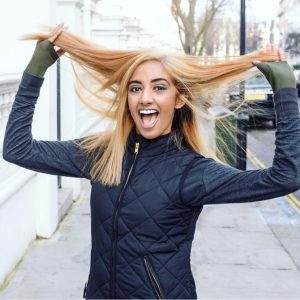
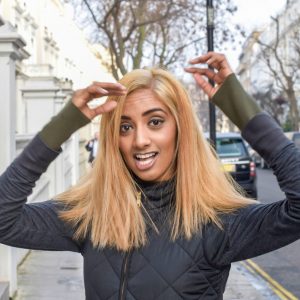
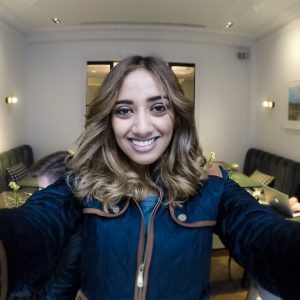
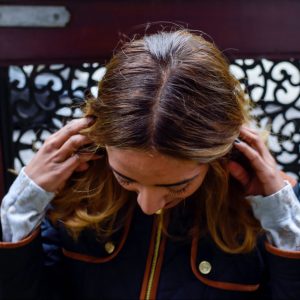
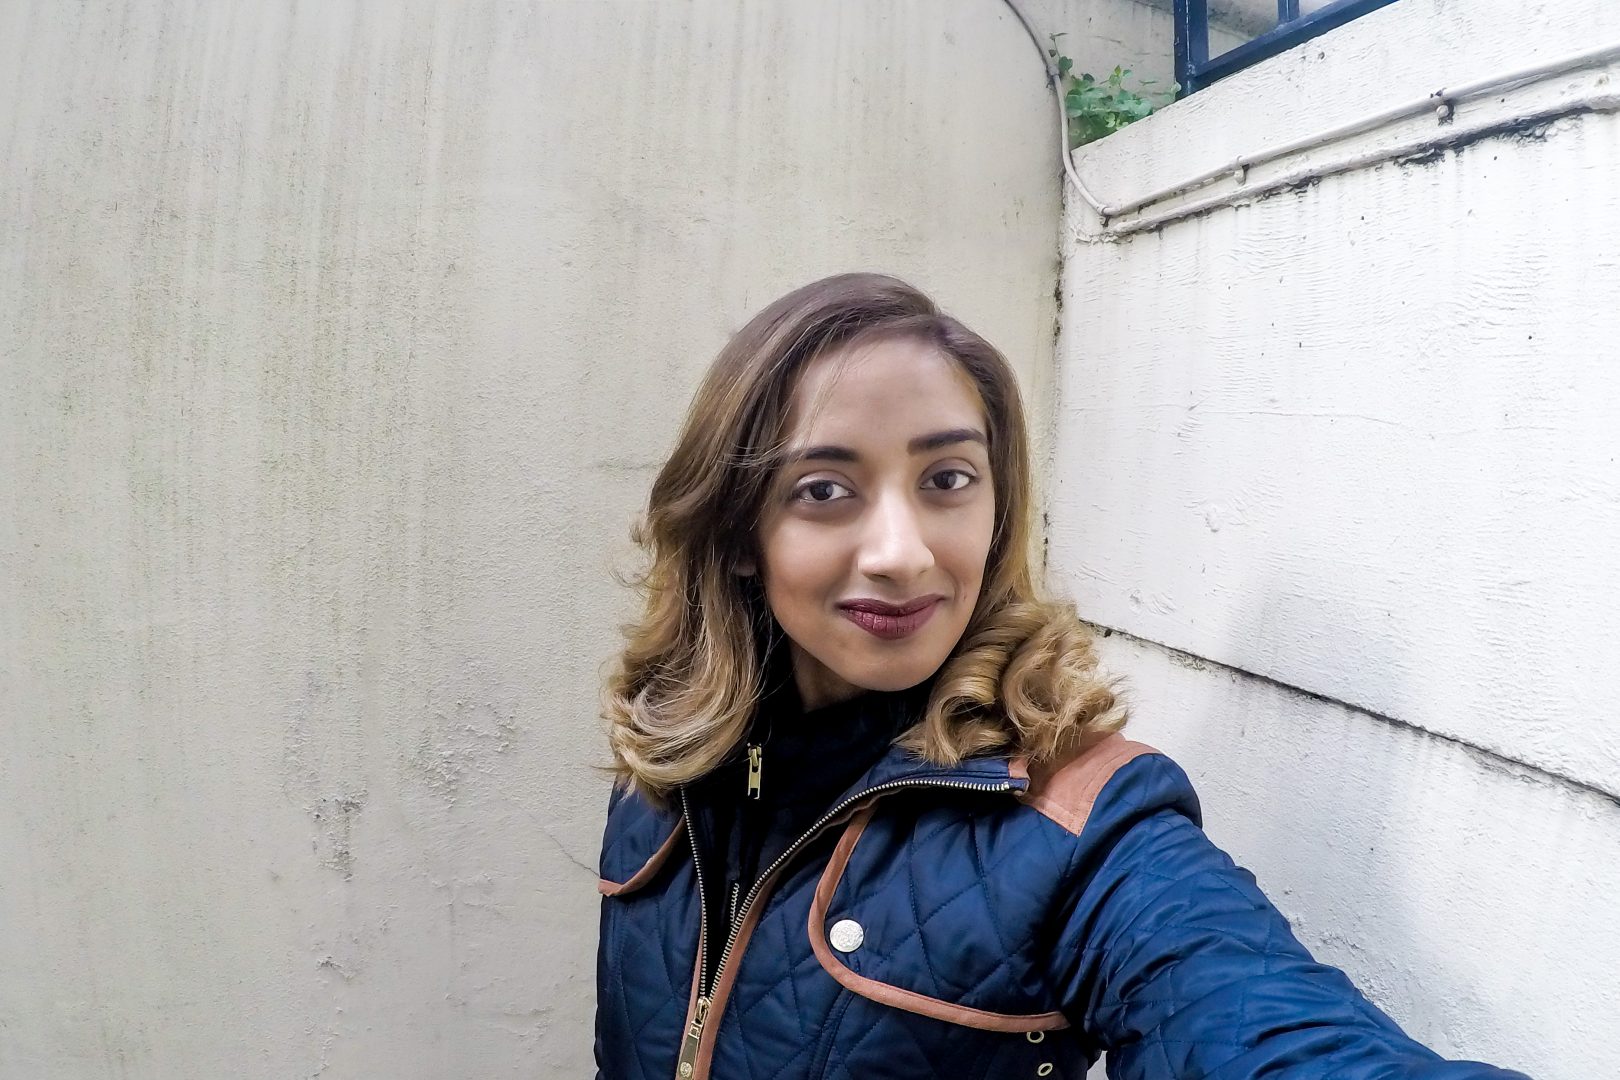
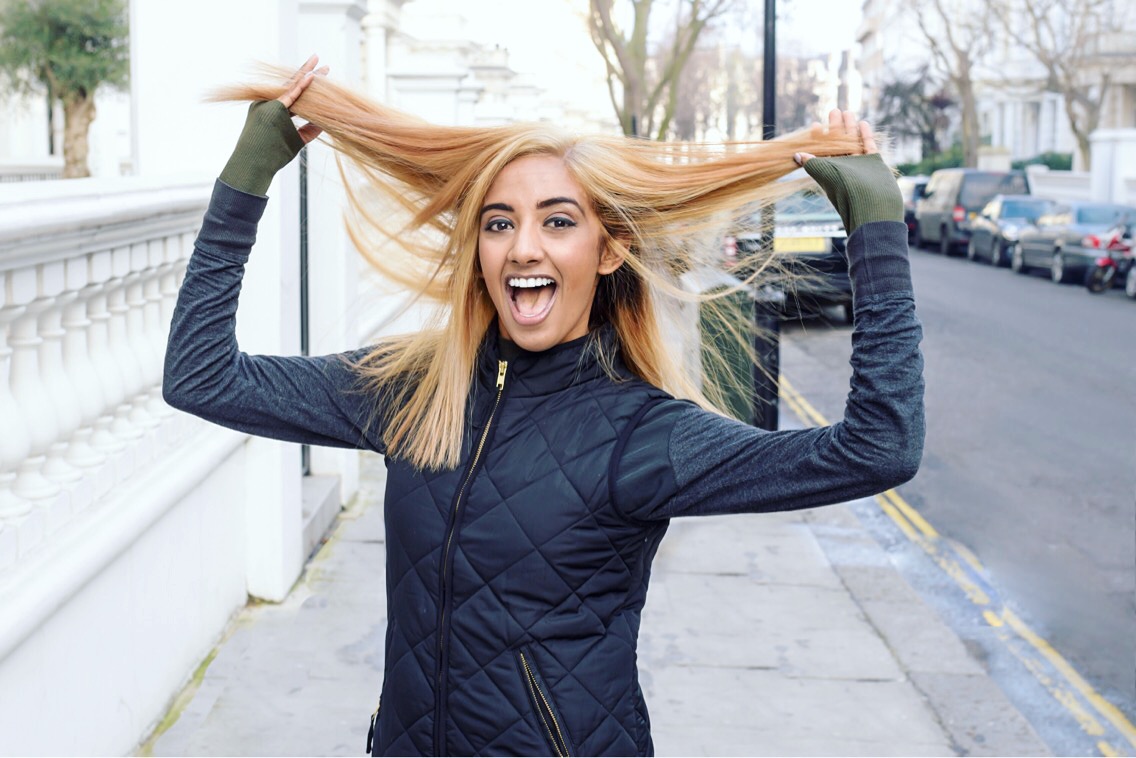
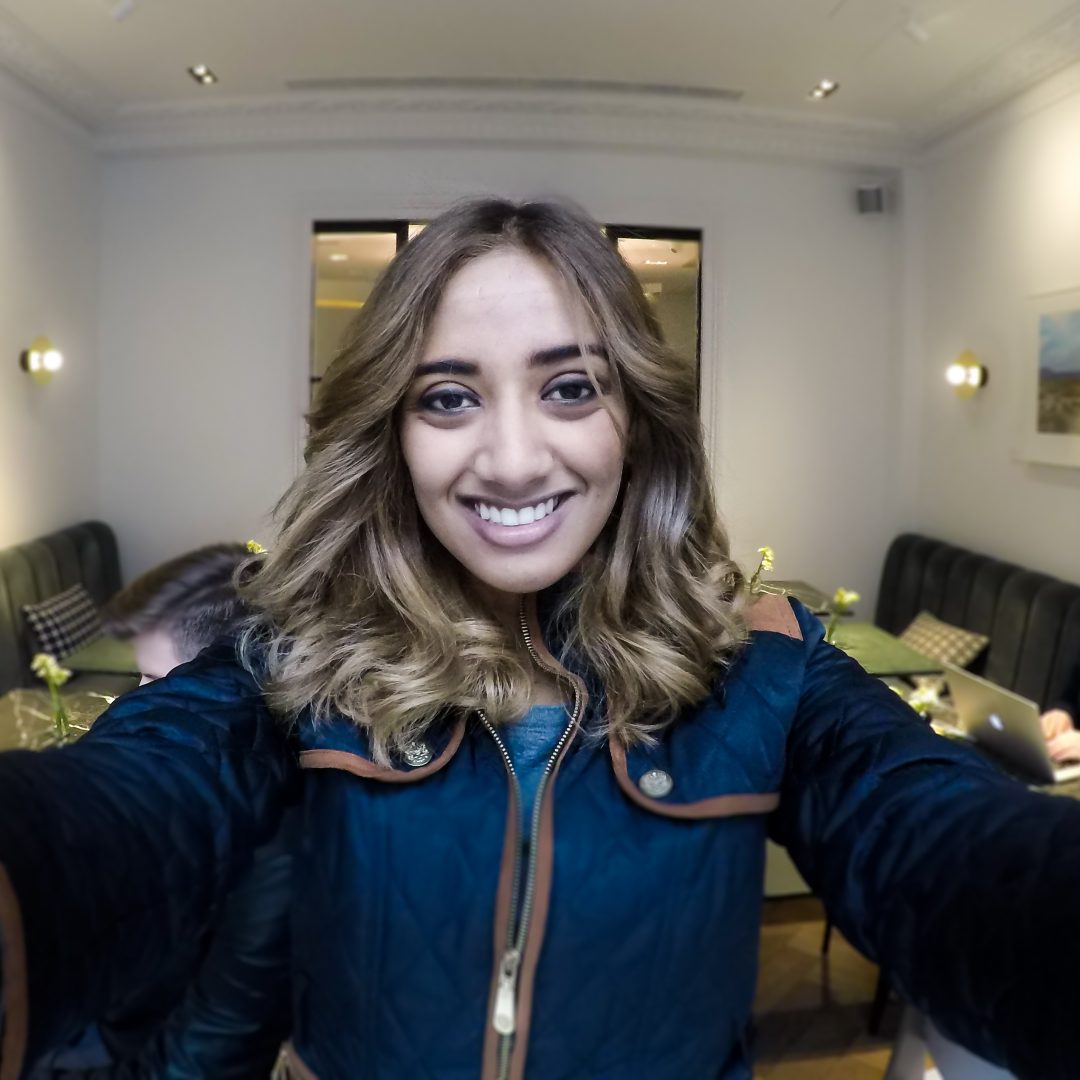
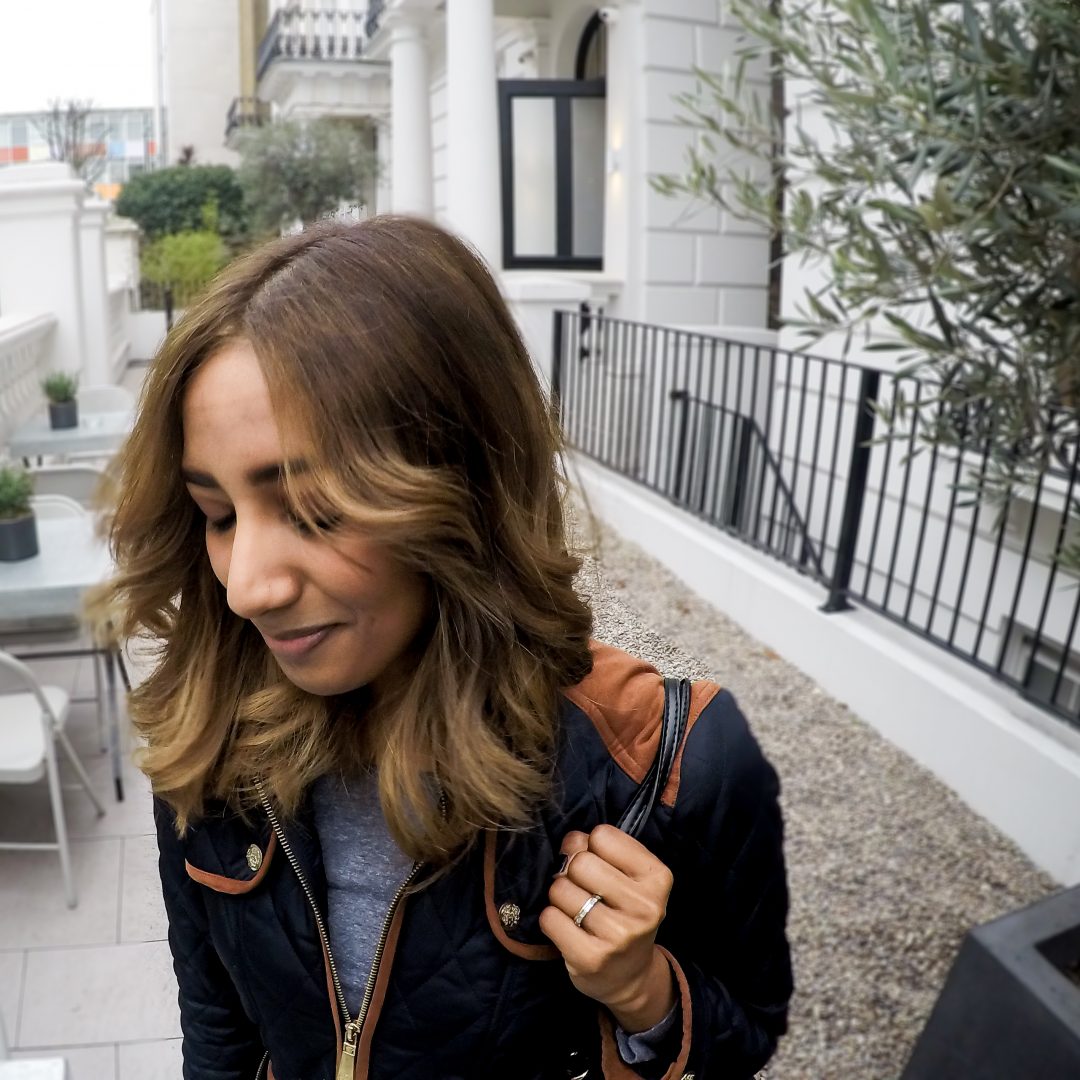
R E S U L T S :
I absolutely love having so much dimension to my hair, especially with the arrival of spring! Blondes do have more fun, and ombres have the best of both worlds. As my black hair grows out, it will blend well with the mocha brown, so the long-term care is not a problem. I still use coconut oil in my hair every time before I wash it (remember, I let the coconut oil sit for an hour) and barely use any shampoo. But when I do use shampoo, I use a dime of purple shampoo to keep the brass away!
I try not to use much heat on my hair, but curls are so pretty and they last for days, so I definitely use some heat. If I do use heat, I always use heat protection spray before styling my hair and am gentle when I brush it or put it in a ponytail, and I always let it air dry. Sure, I know I’ll have to touch up the blonde in two months or so, but that’s not a big deal. This hair is a dream. I’ve always wanted to try something and even if it took more than one sitting, my hair is healthy and exactly the way I wanted it to be. Trust your gut ladies, and above all, be patient. Use the resources available to you online and go after what it is that you want because you’ll never know until you try!


**This is what worked for me. I do not guarantee that this will work on your hair. If you have any specific questions, feel free to comment below!
So tell me, do you think you will try the black to blonde ombre?
Cheers,